How Can We Help?
Add Google Analytics
How to Signup with Google Analytics
Google Analytics is available for free and all you need is a Google or Gmail account to sign up. The sign up process is quite simple, follow the step by step instructions below to create your Google Analytics account.
Step 1: First you need to visit Google Analytics sign up.
You will be asked to login with your Google account. If you already have a Google or Gmail account, then you can use that to sign-in. Otherwise, you can go ahead and create a Google account for yourself.
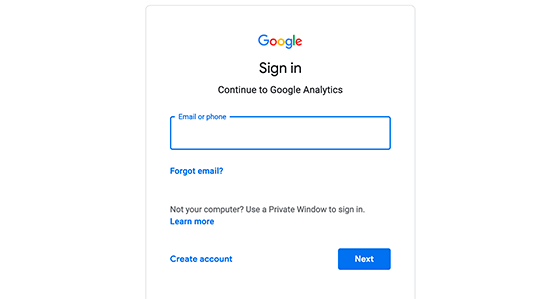
Step 2: Once you sign-in with your Gmail account, you will be prompted to a screen like the one below. This is where you will signup for Google analytics with your Gmail account.

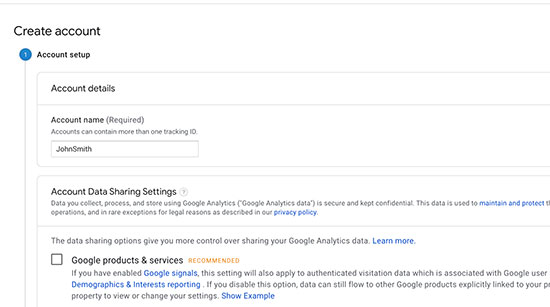
After that, you will be asked to provide an account name. This name will be used internally so you can use anything like your business name.
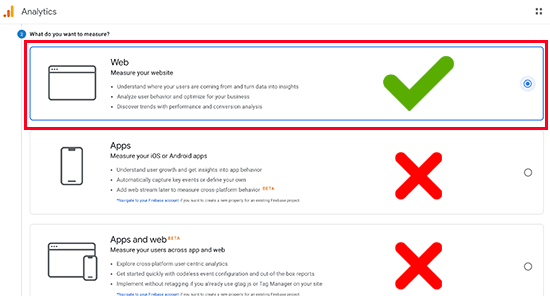
Step 3: On the next screen, you will be given choice to choose between a web, apps, or apps and web. Make sure you select ‘Web’.
After that, you need to enter website name, website’s URL, country, and time zone.
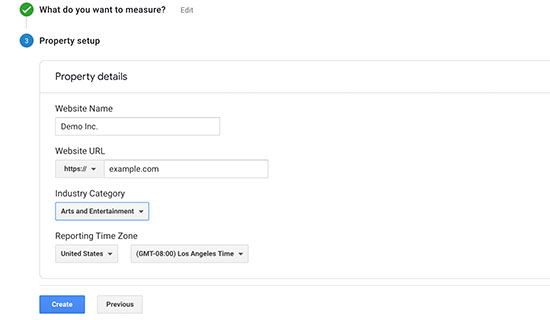
Once you have entered this information, click on the Next button. You will be presented with Google Analytics terms and service which you must agree to, so click on ‘I Agree’ button.
Step 4: Now you will be presented with your Google Analytics tracking code. You can copy this tracking code because you will need to enter it in your WordPress site depending on the method you use below.
You cann also simply leave this browser tab open and switch back to copy the code when needed.
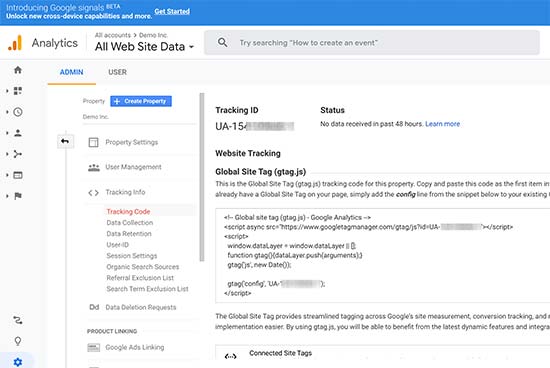
We suggest leaving the analytics browser tab open as you may need to revisit it, once you have installed the code on your WordPress site.
Now that you have setup a Google Analytics account, let’s take a look at how to install Google Analytics in WordPress.
Insert Headers and Footers Plugin
This method is not as good as MonsterInsights because you will not be able to do advanced tracking configuration, and you will not be able to view Google Analytics data in your WordPress dashboard.
First, you will need to copy your Google Analytics tracking code that you copied earlier in Step 4 when signing up for Google Analytics account.
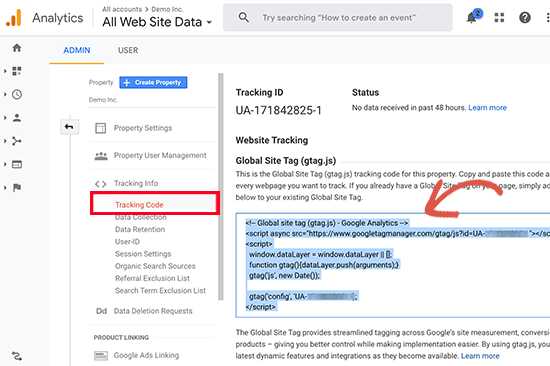
Next, you need to install and activate the Insert Headers and Footers plugin. For more details, see our step by step guide on how to install a WordPress plugin.
Upon activation, you need to visit Settings » Insert Headers and Footers page. Here you need to paste the Google Analytics tracking code that you copied earlier into the ‘Scripts in headers’ section.
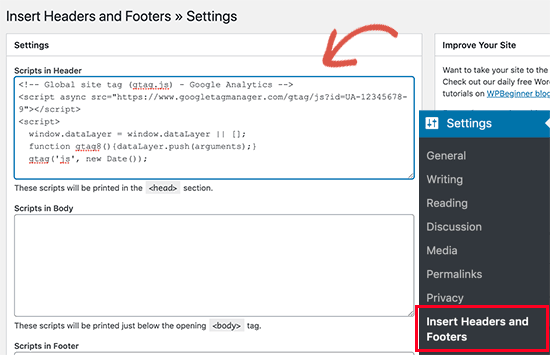
Don’t forget to click on the save changes button to store your settings.
That’s all, you have successfully installed Google Analytics on your site.
Viewing Reports on Google Analytics Website
Google Analytics is capable of showing you a treasure of data collected from your stats. You can view this data by visiting your Google Analytics dashboard.
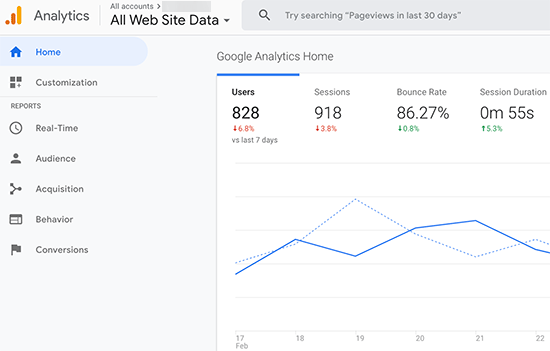
You will see the built-in Google Analytics reports in the left column. Each section is divided into different tabs and clicking on a tab will expand it to show more options.
- Real-time This report will show you a real time view of your traffic.
- Audience tab will show reports to help you understand your users.
- Acquisition reports explore where your users came from.
- Behavior reports summarize what your users do after they arrive on your site.
- Conversion reports show how well you’re doing against your goals.
