How Can We Help?
Change nameservers for my domain inside Namecheap
This tutorial will guide you on changing your domain name nameservers inside Namecheap. This step is required if you’ve purchased a domain name from Namecheap but decided to use a different hosting provider.
You simply have to log into your Namecheap account and update the nameservers.
To change the Namecheap nameservers:
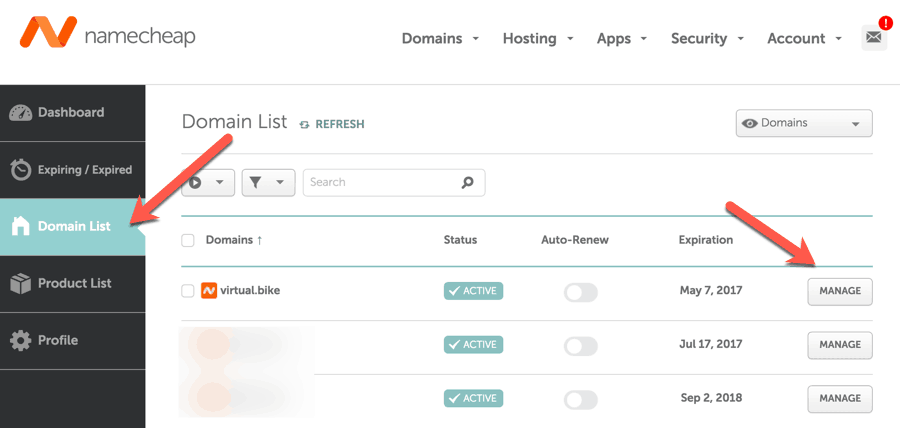
- Log into your Namecheap account and click on “Domain List” on the left sidebar.

This will list all of the domains under your Namecheap account.
- Click on “Manage” in front of the domain name which you want to point to our servers.
This will take you to your domain management page.
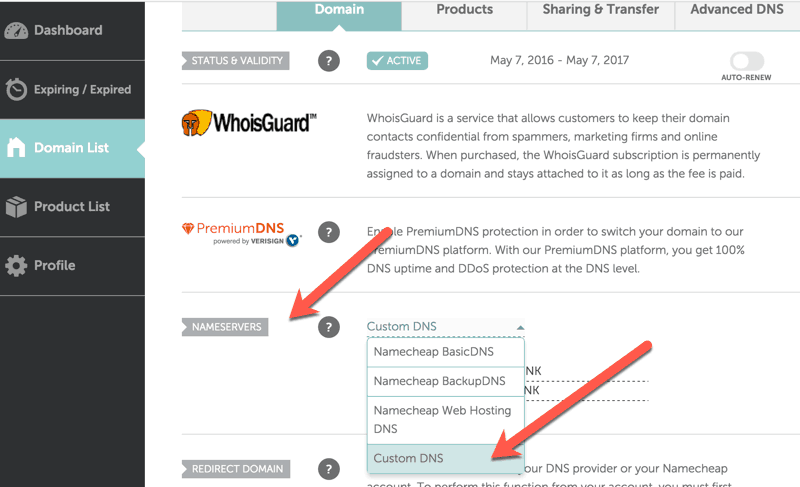
- Scroll down until you see the section that says “NAMESERVERS” & select the “Custom DNS” option from the dropdown menu.

This will bring up the nameservers tab where you can add your custom nameservers.
So, here you can fill in the nameservers of the hosting you’d like to use. If you don’t know them, you can reach out to the customer support of your hosting provider, and they will help you find them. For example, if you’ve purchased your domain name from GoDaddy, but you want to use Bluehost as a hosting provider, you have to update the nameservers to ns1.bluehost.com & ns2.bluehost.com

- When done, click on the green checkmark to save your new nameserver changes.
It takes some time for these changes to take effect, so don’t worry if your site still opens the Namecheap default page.
